Guide
From install to the first reorder list.
Everything happens inside your Shopify admin. The app only reads your store: it shows the numbers, you place the orders.
1. Install the app
Open njX Stock Alerts & Reorder in the Shopify App Store and click Install. There is no account to create. The app asks to read products, inventory, locations and orders — and nothing else: it cannot change anything in your store.
2. Answer one question while your stock is read
The first load takes a minute or two: products, stock by location and the last 60 days of sales. Meanwhile the app asks for two numbers in plain days of stock — under how many days it should tell you to reorder (14 by default) and when it is critical (7) — and a third one in units, for products that have no sales history yet: at or below that count (5 by default) a product is critical by count alone, until it has enough sales for a pace. Everything else has sensible defaults; you can change both later in Settings.
3. Read the reorder list
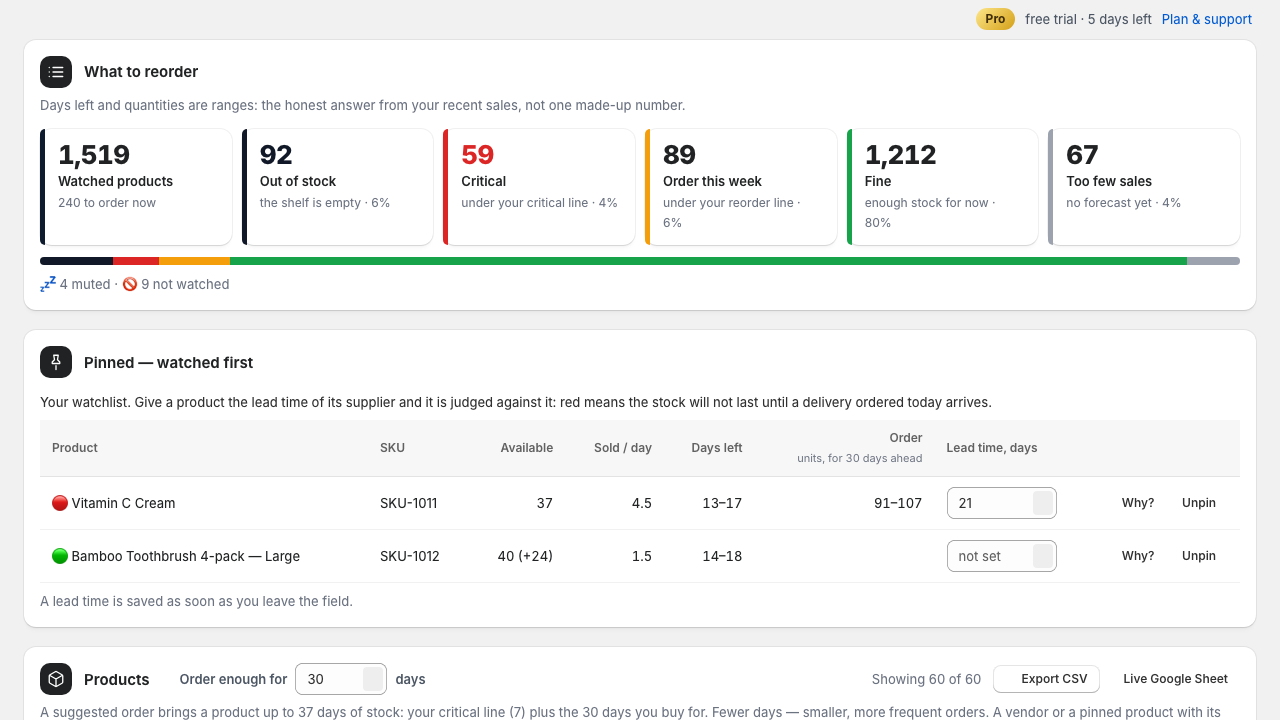
What to reorder opens on “To order”: ⚫ out of stock, 🔴 critical, 🟡 time to reorder. Days left and the quantity are ranges — sales are a count, not a constant. “All” is your whole catalogue; every column sorts; the controls and the table head stay in view while you scroll. Export CSV downloads exactly what you filtered.
4. Press “Why?” on any number
Each row opens into four steps you can redo by hand: how fast it sells (units sold ÷ days on the shelf, with what was left out), how long the stock lasts, what the product is judged against (your two lines, or a supplier lead time), and how the quantity was worked out. If it still looks wrong, tell us from Plan & support — name the product and what you expected.
5. Pin what you care about most
Press 📌 Pin on a product to watch it first. Pinned products are always forecast, are shown in their own table and come first in every list and alert. Give a pinned product the lead time of its supplier and it is judged against it: red then means the stock will not last until a delivery ordered today arrives. The field saves itself when you leave it.
6. Choose where the list goes
Recipients → add an e-mail address (its owner confirms it by a link first), or on Pro connect Slack with one click and pick a channel, or paste a Discord channel webhook. A channel is saved only after this week’s list arrives there as a test. On Home, “What you receive” shows every report exactly as it would be sent, built from your own stock.
7. Tune three numbers, not thirty
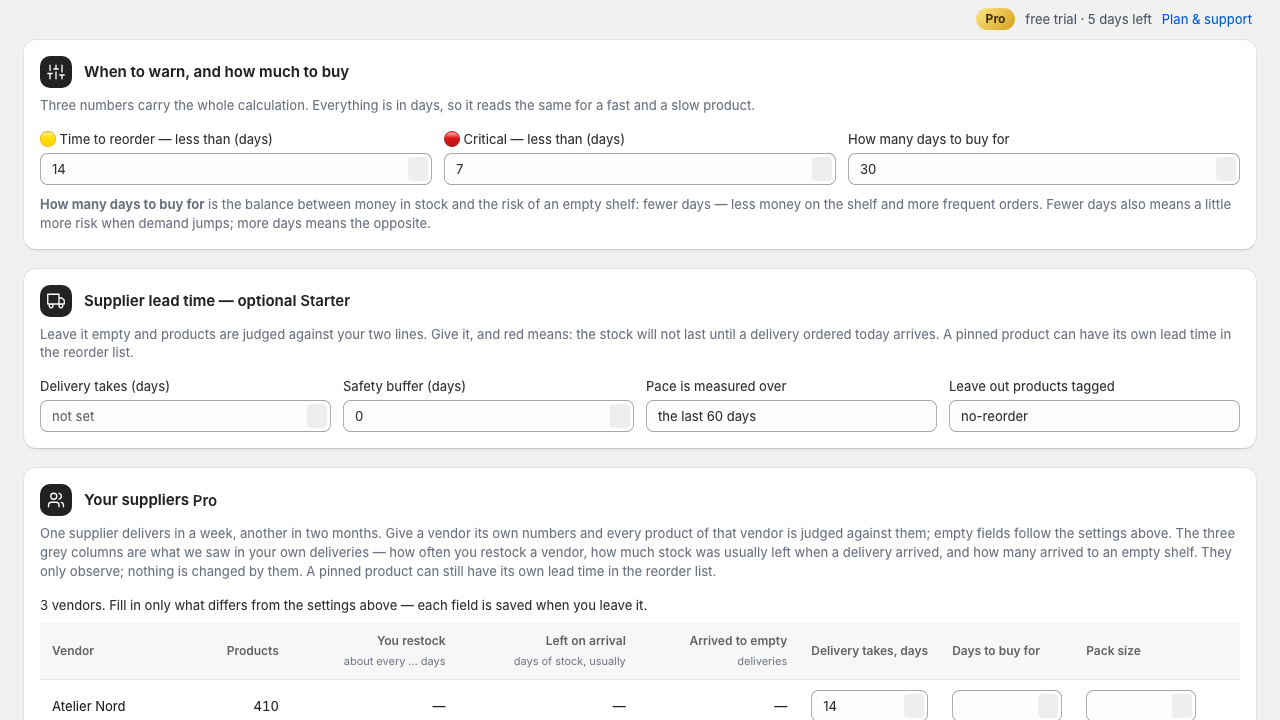
Settings holds the two lines and “how many days to buy for” — the balance between money on the shelf and the risk of an empty one. Optionally a supplier lead time for the shop, and on Pro per vendor: next to each vendor you see how often you really restock it, how much stock was usually left when a delivery arrived, and how many deliveries found the shelf empty. Everything saves as you change it.
8. Look at the best and the worst
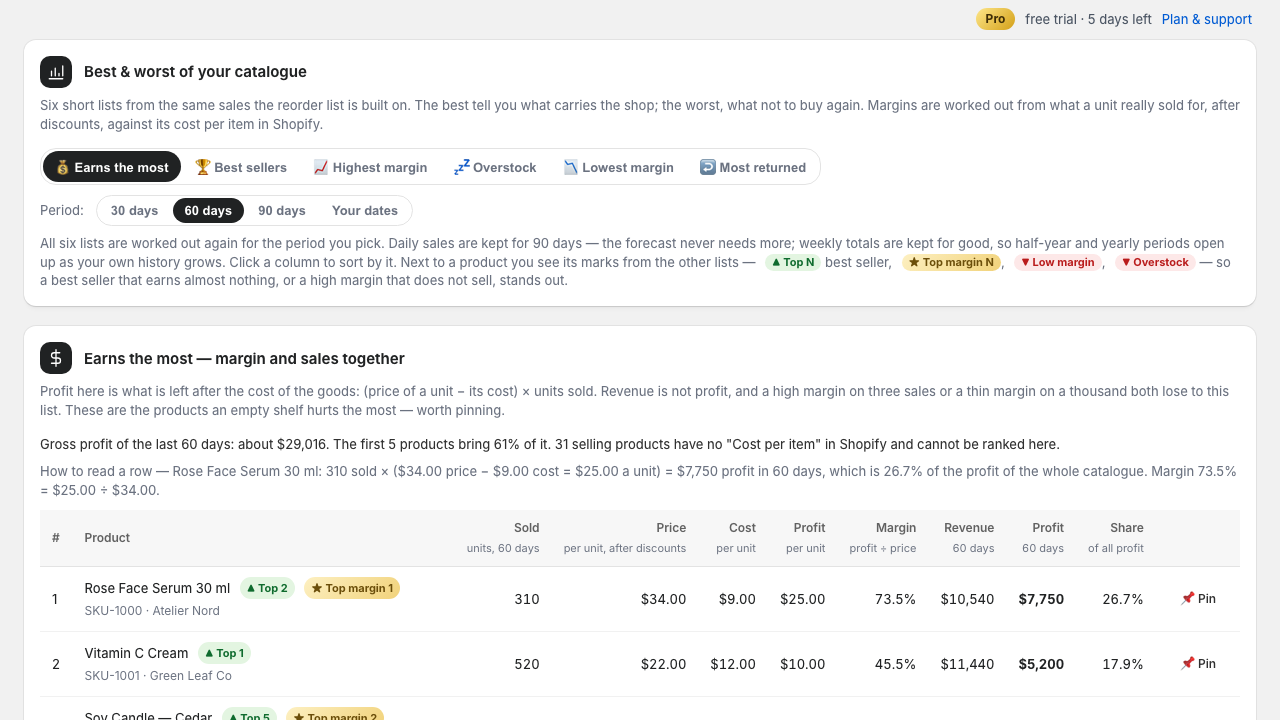
Six short lists for 30, 60 or 90 days or your own dates: what earns the most (margin and sales together), best sellers, highest margin — and overstock, lowest margin, most returned. A line above each table reads one row out loud with your own numbers. Margins need “Cost per item” in Shopify; without it the list says how many products are missing it.
9. Stop or change anything
Every e-mail has a one-click unsubscribe; recipients and Slack workspaces are removed in the app (our access in Slack is revoked at the same moment). Manage plan opens Shopify’s plan page; downgrading deletes nothing. Uninstalling the app deletes everything we hold about your store within 48 hours.